As an Amazon Affiliate I earn from qualifying purchases.
This post contains affiliate links, which means I make a small commission at no extra cost to you. See my full disclosure here.
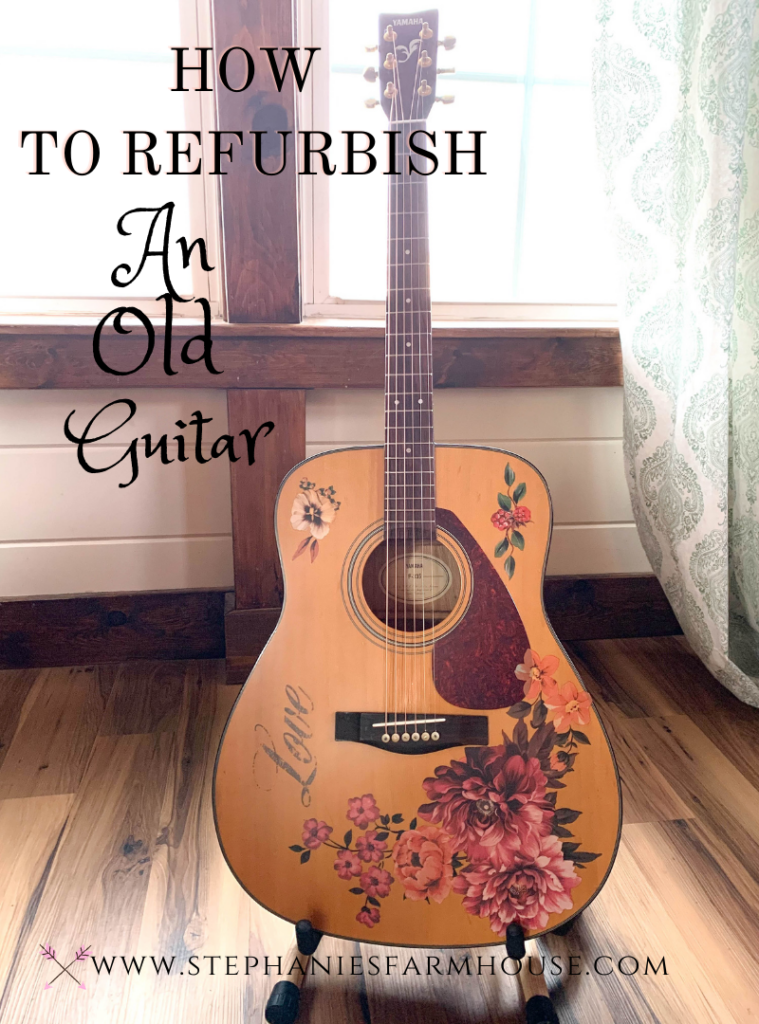
When I first thought about how to refurbish an old guitar I really had no idea where to start. My daughter wanted a guitar for her birthday and I was going to buy her a new one. The more I thought about it the more I knew I wanted it to reflect her personal style, so I decided I was going to do some fun things to it.
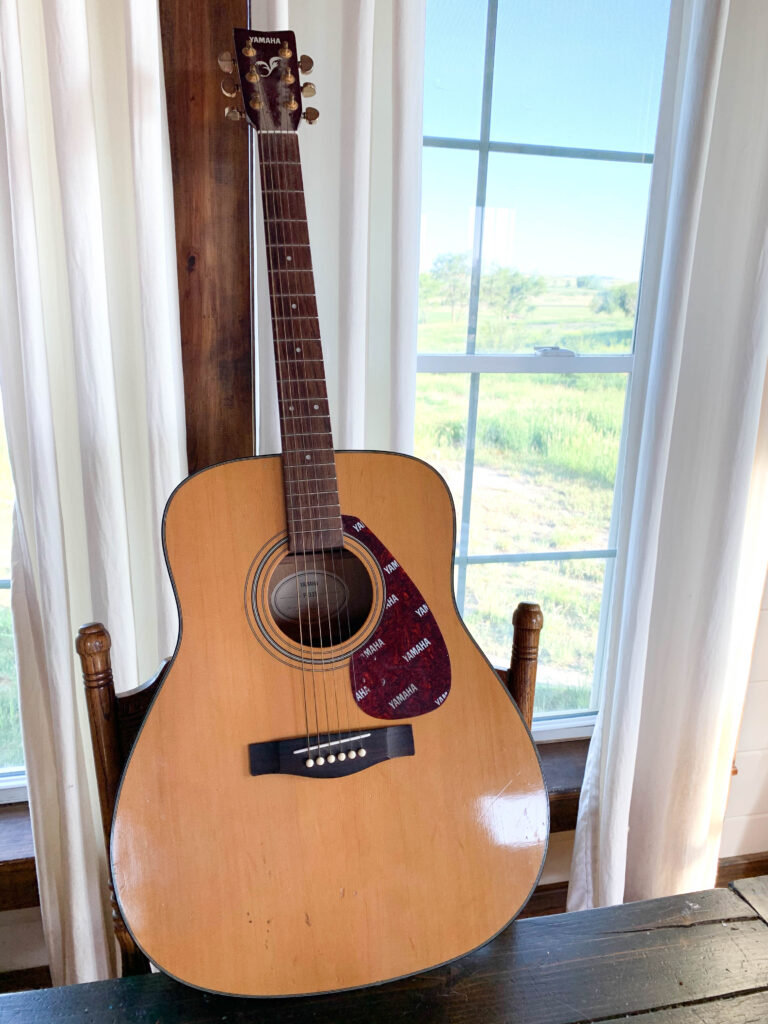
She previously highjacked this 20 year old guitar that was her dad’s and carried it around to tinker on. This guitar had definitely seen better days, but I knew it meant a lot to her so I made the decision to refurbish this one.
Let’s get to work!
I started by giving this old guitar a scrub down with dawn dish soap and water. It was pretty grimy LOL.
When it dried completely I started the really fun part.
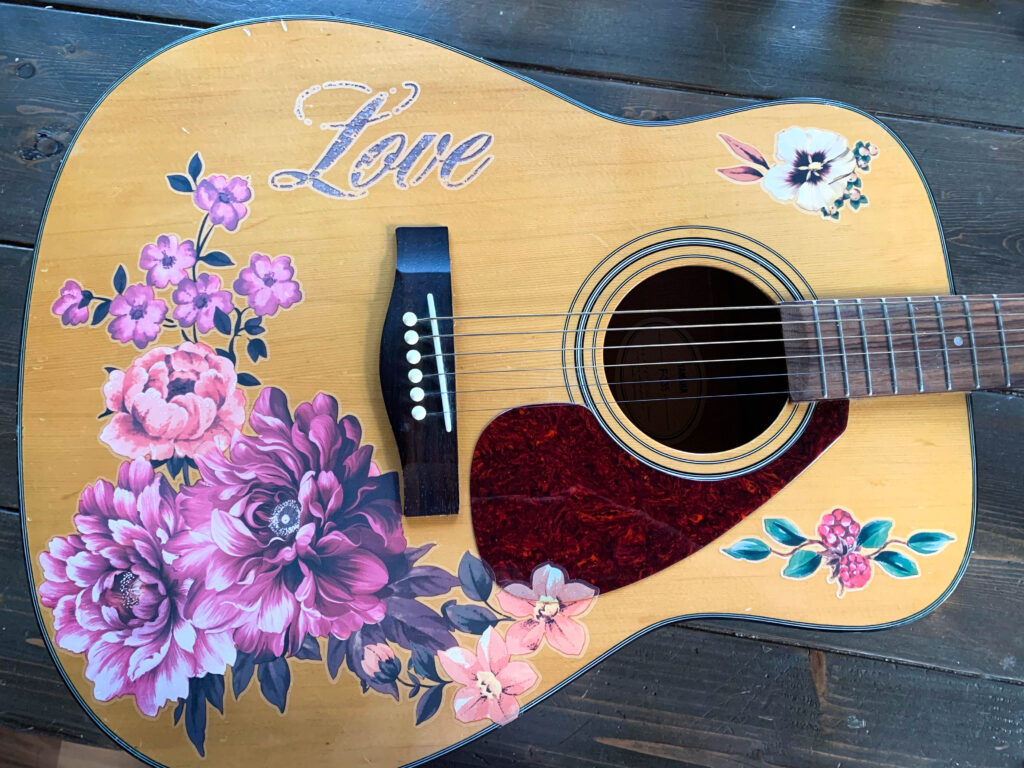
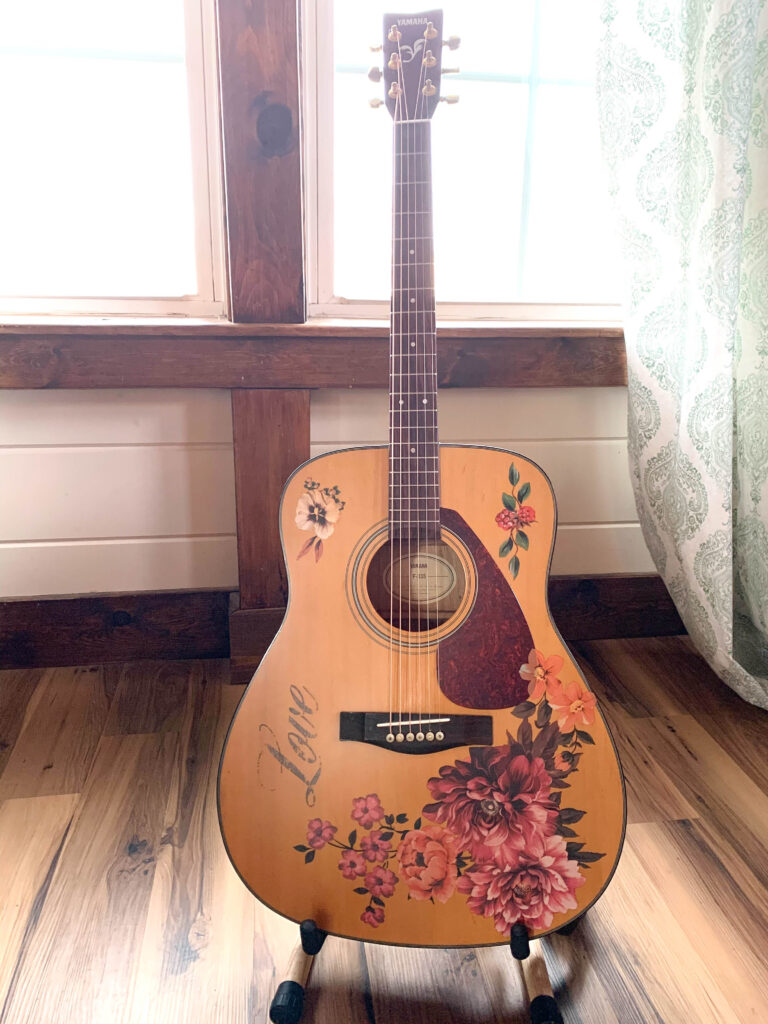
Time for Transfers
After thinking about how to refurbish an old guitar and what I wanted to do with it, I decided hand painting the images was not the route I wanted to go. I didn’t know if the layers of paint required would affect the sound and it wasn’t a risk I was going to take on this guitar.
I turned to Redesign with Prima transfers and they worked PERFECTLY. They are beautiful and thin and really easy to use.
I cut out the pieces of the transfer that I wanted to use and placed them where I wanted them on the guitar. When I decided on final placement, I applied them. You just peel off the back and place them on your piece.
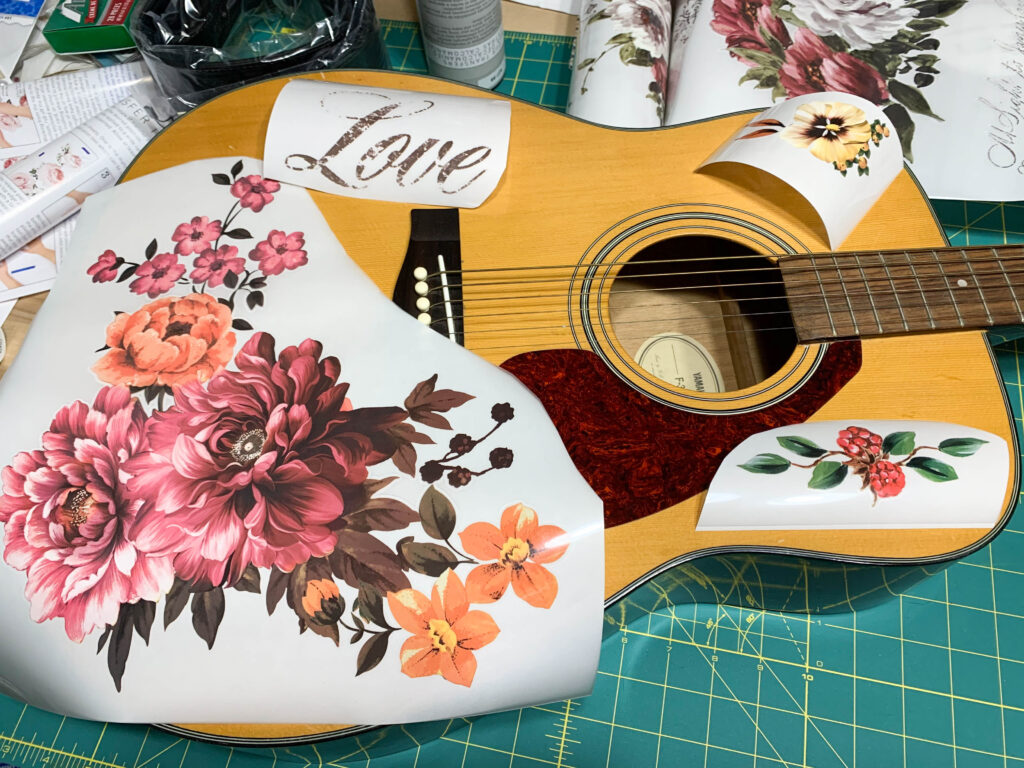
I used the Redesign with Prima application tool to make sure the transfer was well applied. You don’t want air bubbles between the project and the transfer. I then carefully removed the top piece making sure I didn’t lift the transfer.
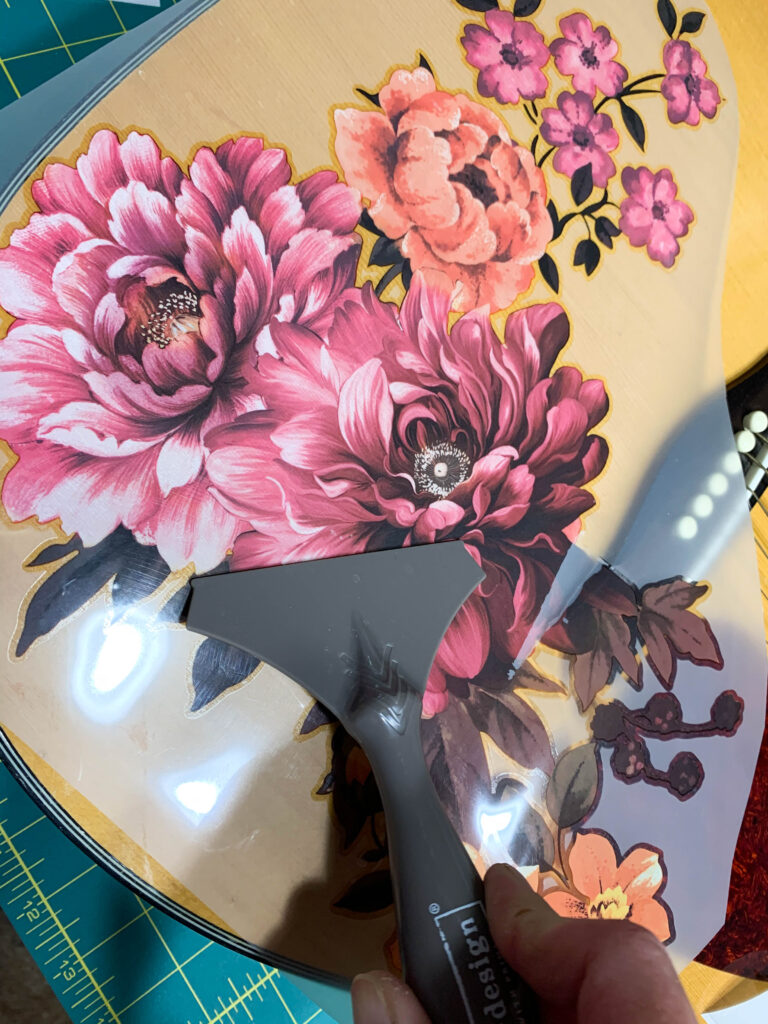
Sealing the transfer protects it so I used a sponge brush and Minwax Polycrylic in clear matte finish over the entire front of the guitar. I focused on the seams of the transfer to make sure they were secure.

Time for more fun!
When the polycrylic was completely dried, I addressed the other things that needed work.
The original bridge pins were plastic and the end pin was missing. There wasn’t a strap button. The strings were toast. The stand was long gone.
Bridge Pins, End Pin, and Strings for this Refurbished Guitar
I’ve played music for a number of years and I know that certain things affect sound. After a lot of research I decided on bone bridge pins and a bone end pin. I also oiled the fretboard. The strings may have been the hardest thing to choose but, in the end, I think I made a good choice. They sound beautiful and look amazing as well!

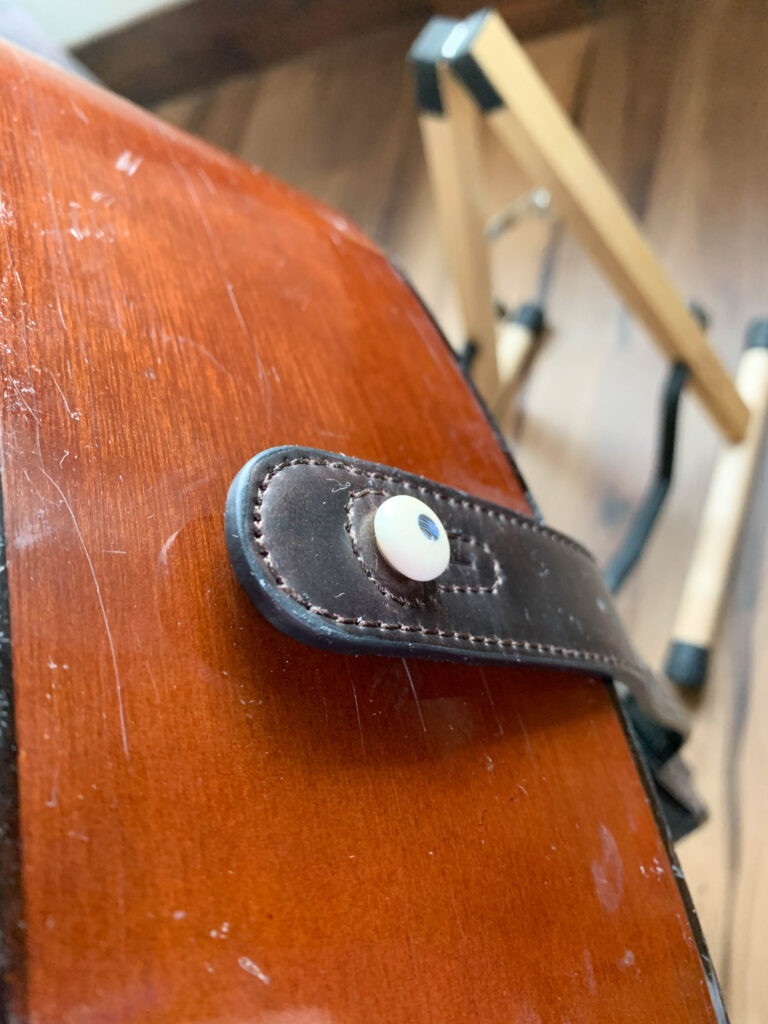
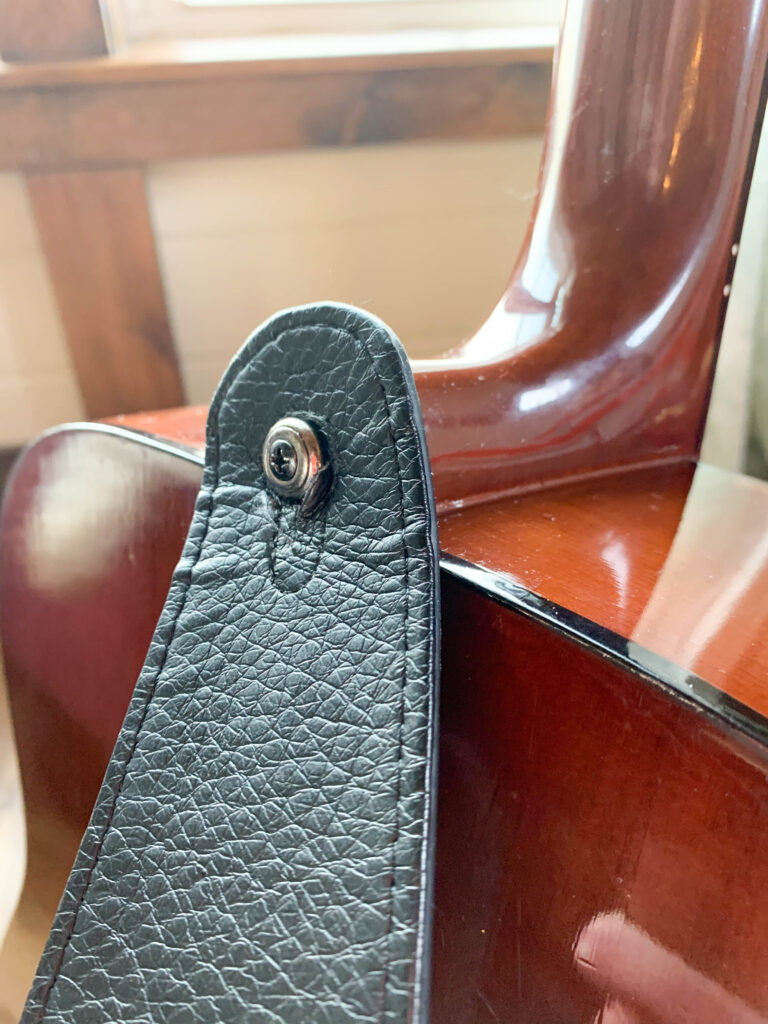
Now for the Strap Button
I bought a metal strap button. This guitar didn’t have a strap button originally so I had to decide where I wanted to put it. This seems to be the perfect place as it allows the strap to lay perfectly on my daughter’s shoulder. I used a drill to make a pilot hole and then used a hand screw driver to attach the strap button.
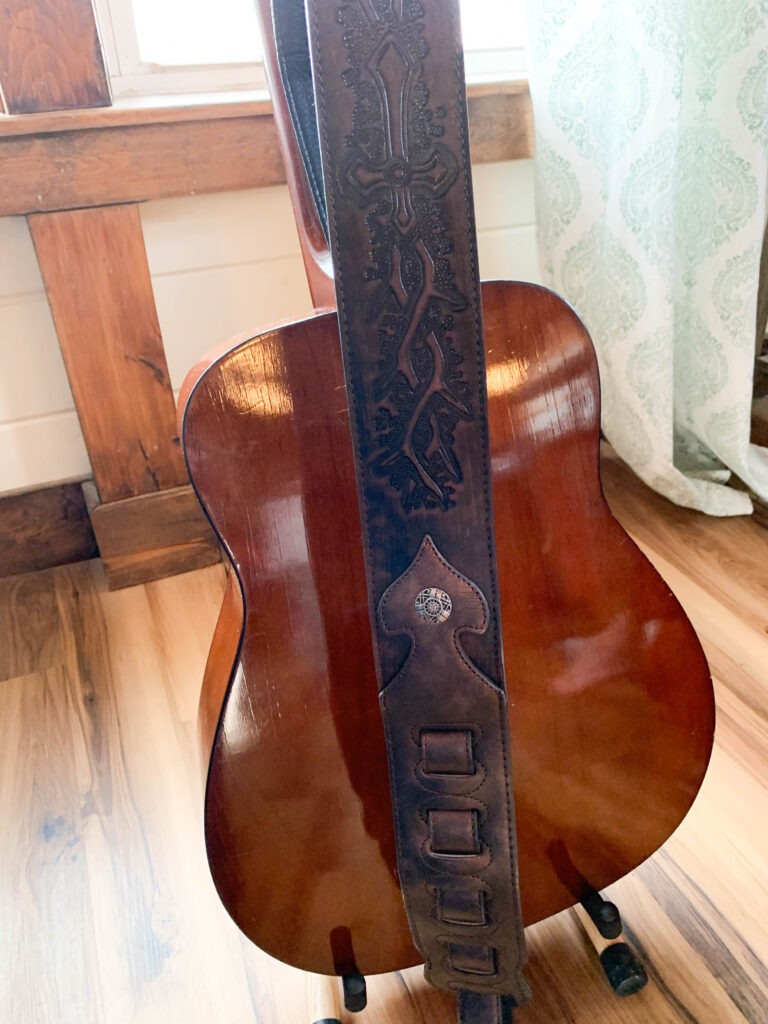
The Final Touch- The Leather Strap
I chose this beautiful leather strap as the finishing touch.
This Old Guitar is Refurbished!!
She ABSOLUTELY LOVES IT
A few other things I purchased for her include: