
My mother picked up this rocking chair from an antique shop in South Dakota. When I first saw it I knew instantly it would make an amazing upcycle project. I loved everything about it. It was so very old, and for the most part, untouched. Even the hardware was antique. I knew I wanted to keep the antique look, but definitely wanted to paint it a different color and replace the cushion. This project is perfect for anyone wanting to spruce up an old piece of furniture and it’s budget and time friendly which is a HUGE bonus! It only required a little paint, a new cushion, a fabric remnant, and a staple gun. SO EASY. I also have a video on my YouTube Channel if you want to check it out!
Let’s Get Started!
This was the chair before I did anything to it.

The first thing I needed to do was take the cushion off. I started by checking out how it was attached. The fabric held the cushion to a piece of plywood with staples. The plywood had been cut to sit in the frame and was held in place by furniture nails on the front. Removal was easy breezy!


Time to Paint!
Once I got the cushion off, I began painting! I LOVE painting furniture so this was definitely my favorite part. I used Sherwin Williams Antique White in their Cashmere paint. I used a brush to apply the paint because the brush strokes (even though they are not very pronounced) add to the old feel of the chair.

Let’s Do Some Sanding!
I let the paint dry for a day and then sanded the edges very lightly where it would naturally wear with age. I used 120 grit sand paper. I couldn’t find my sanding block so I used sand paper from my electric sander. The thing to focus on here is sanding lightly and building up to the look you are going for. It’s easier than starting too heavy handed and having to repaint it and start over.

Time to Tackle the Cushion!
When I finished sanding and was happy with the look, I moved on to working on the cushion. The old cushion was covered with fabric. The edges of the fabric were stapled to a piece of plywood that had been cut to fit into the rocking chair frame. I pulled all the staples out and removed the old fabric and cushion from the plywood. It definitely had seen better days! haha.

I wish I would’ve taken a photo of the cushion before I put it on the chair, but I forgot. This foam cushion I picked up from the fabric department at Walmart. It was a perfect fit so I didn’t even have to cut it. If you do, however, need to cut a foam cushion to size, an electric knife does the job beautifully.
I had a remnant piece of fabric from my camper remodel that I used. The pattern was visible through the fabric as I laid the foam cushion on it. This made it easy to make sure the pattern would be where I wanted it when the cushion was on the chair. I then laid the plywood on the cushion and pulled the fabric around the edges of the plywood and stapled it.
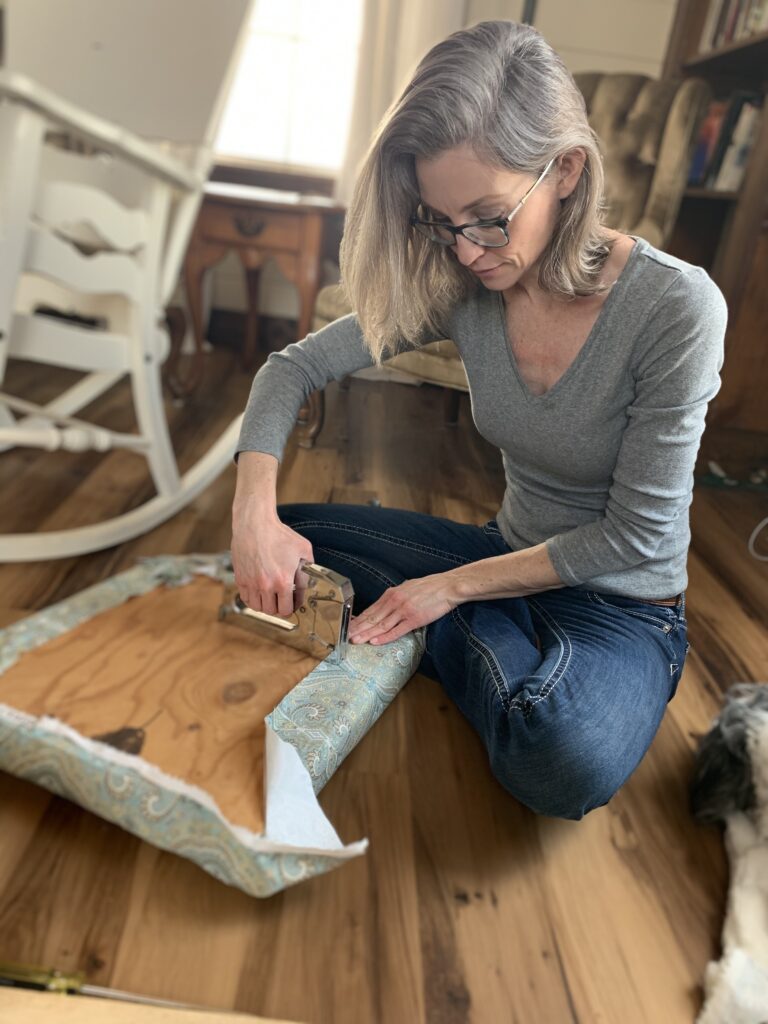
The cushion fit perfectly in the frame and didn’t need any further attaching.
It is Finished!
This rocking chair is finished and I couldn’t be happier with how it turned out! It is PERFECT.
